Automation Studio
Automation Studio is a powerful visual interface that allows you to create, edit, and manage automated workflows with little to no code. This guide will help you understand how to use the studio effectively.
Studio Interface
The Automation Studio interface consists of several key components:
1. Left Navigation Panel
The Left Navigation Panel displays configuration options and information about the entire workflow. Key sections include:
- Home: Navigates to the main dashboard
- Outline: Displays the workflow structure
- Settings: Configure workflow settings
- Version History: View and manage workflow versions
2. Top Menu Bar
This section contain quick navigation links to workflows, name of current workflow, publish button and on/off button to enable or disable the workflow.

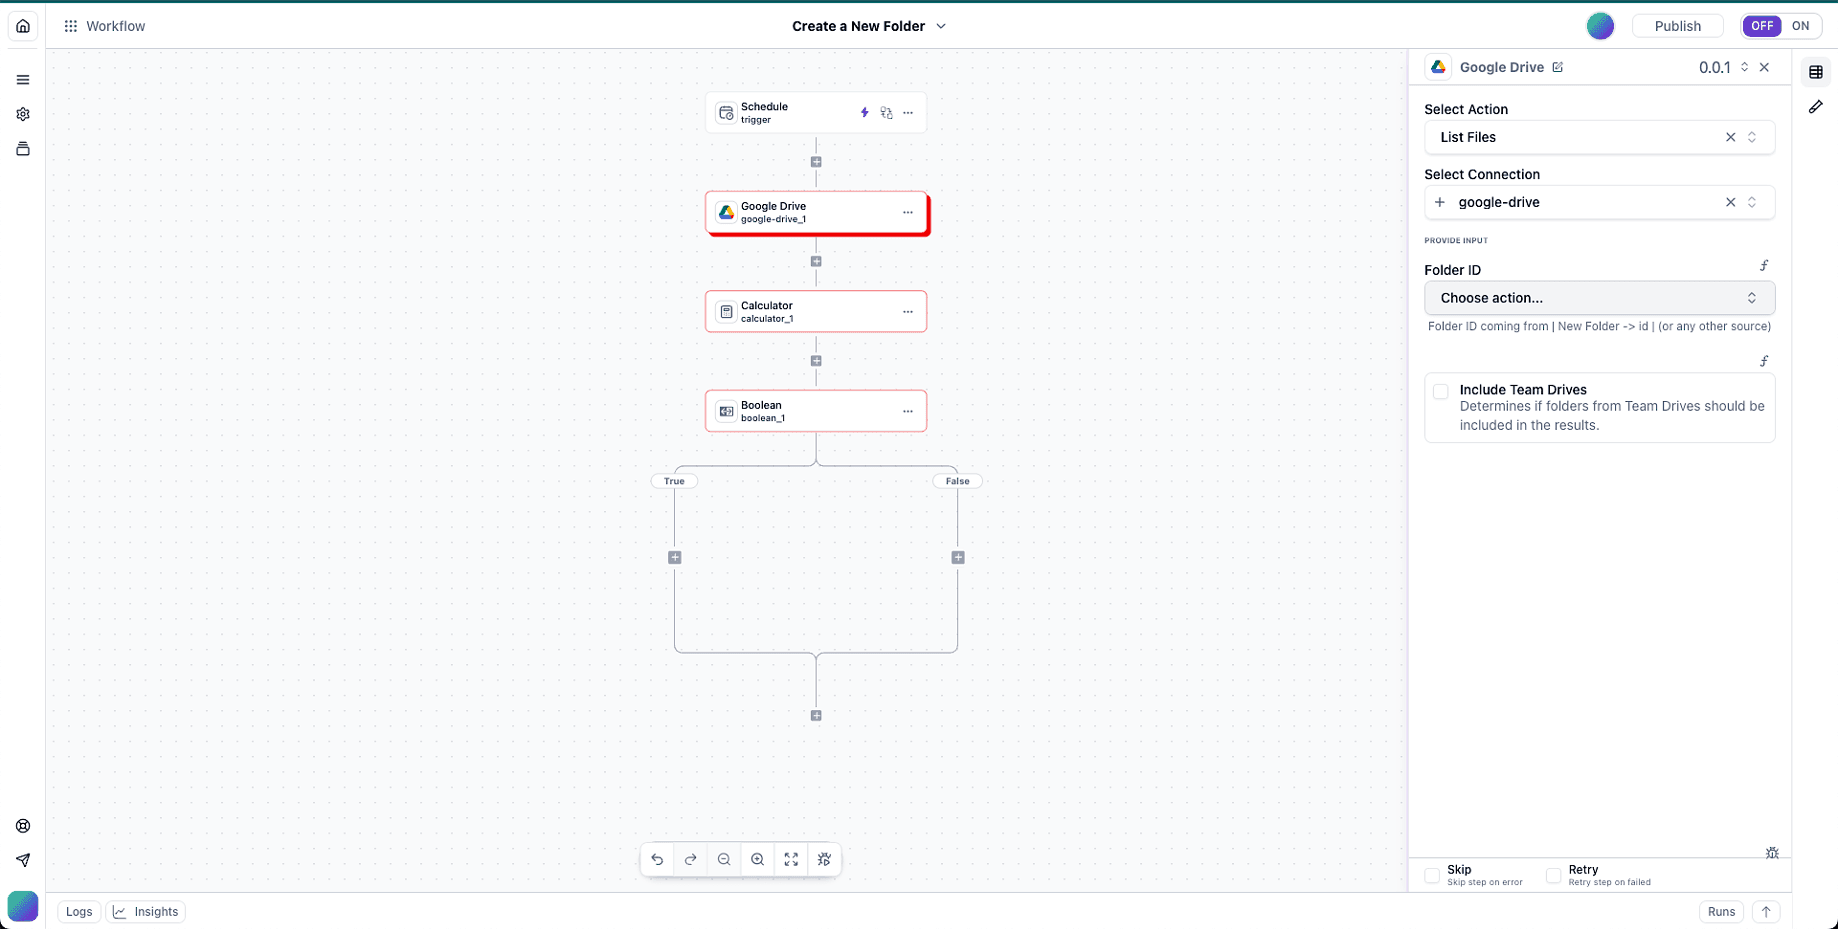
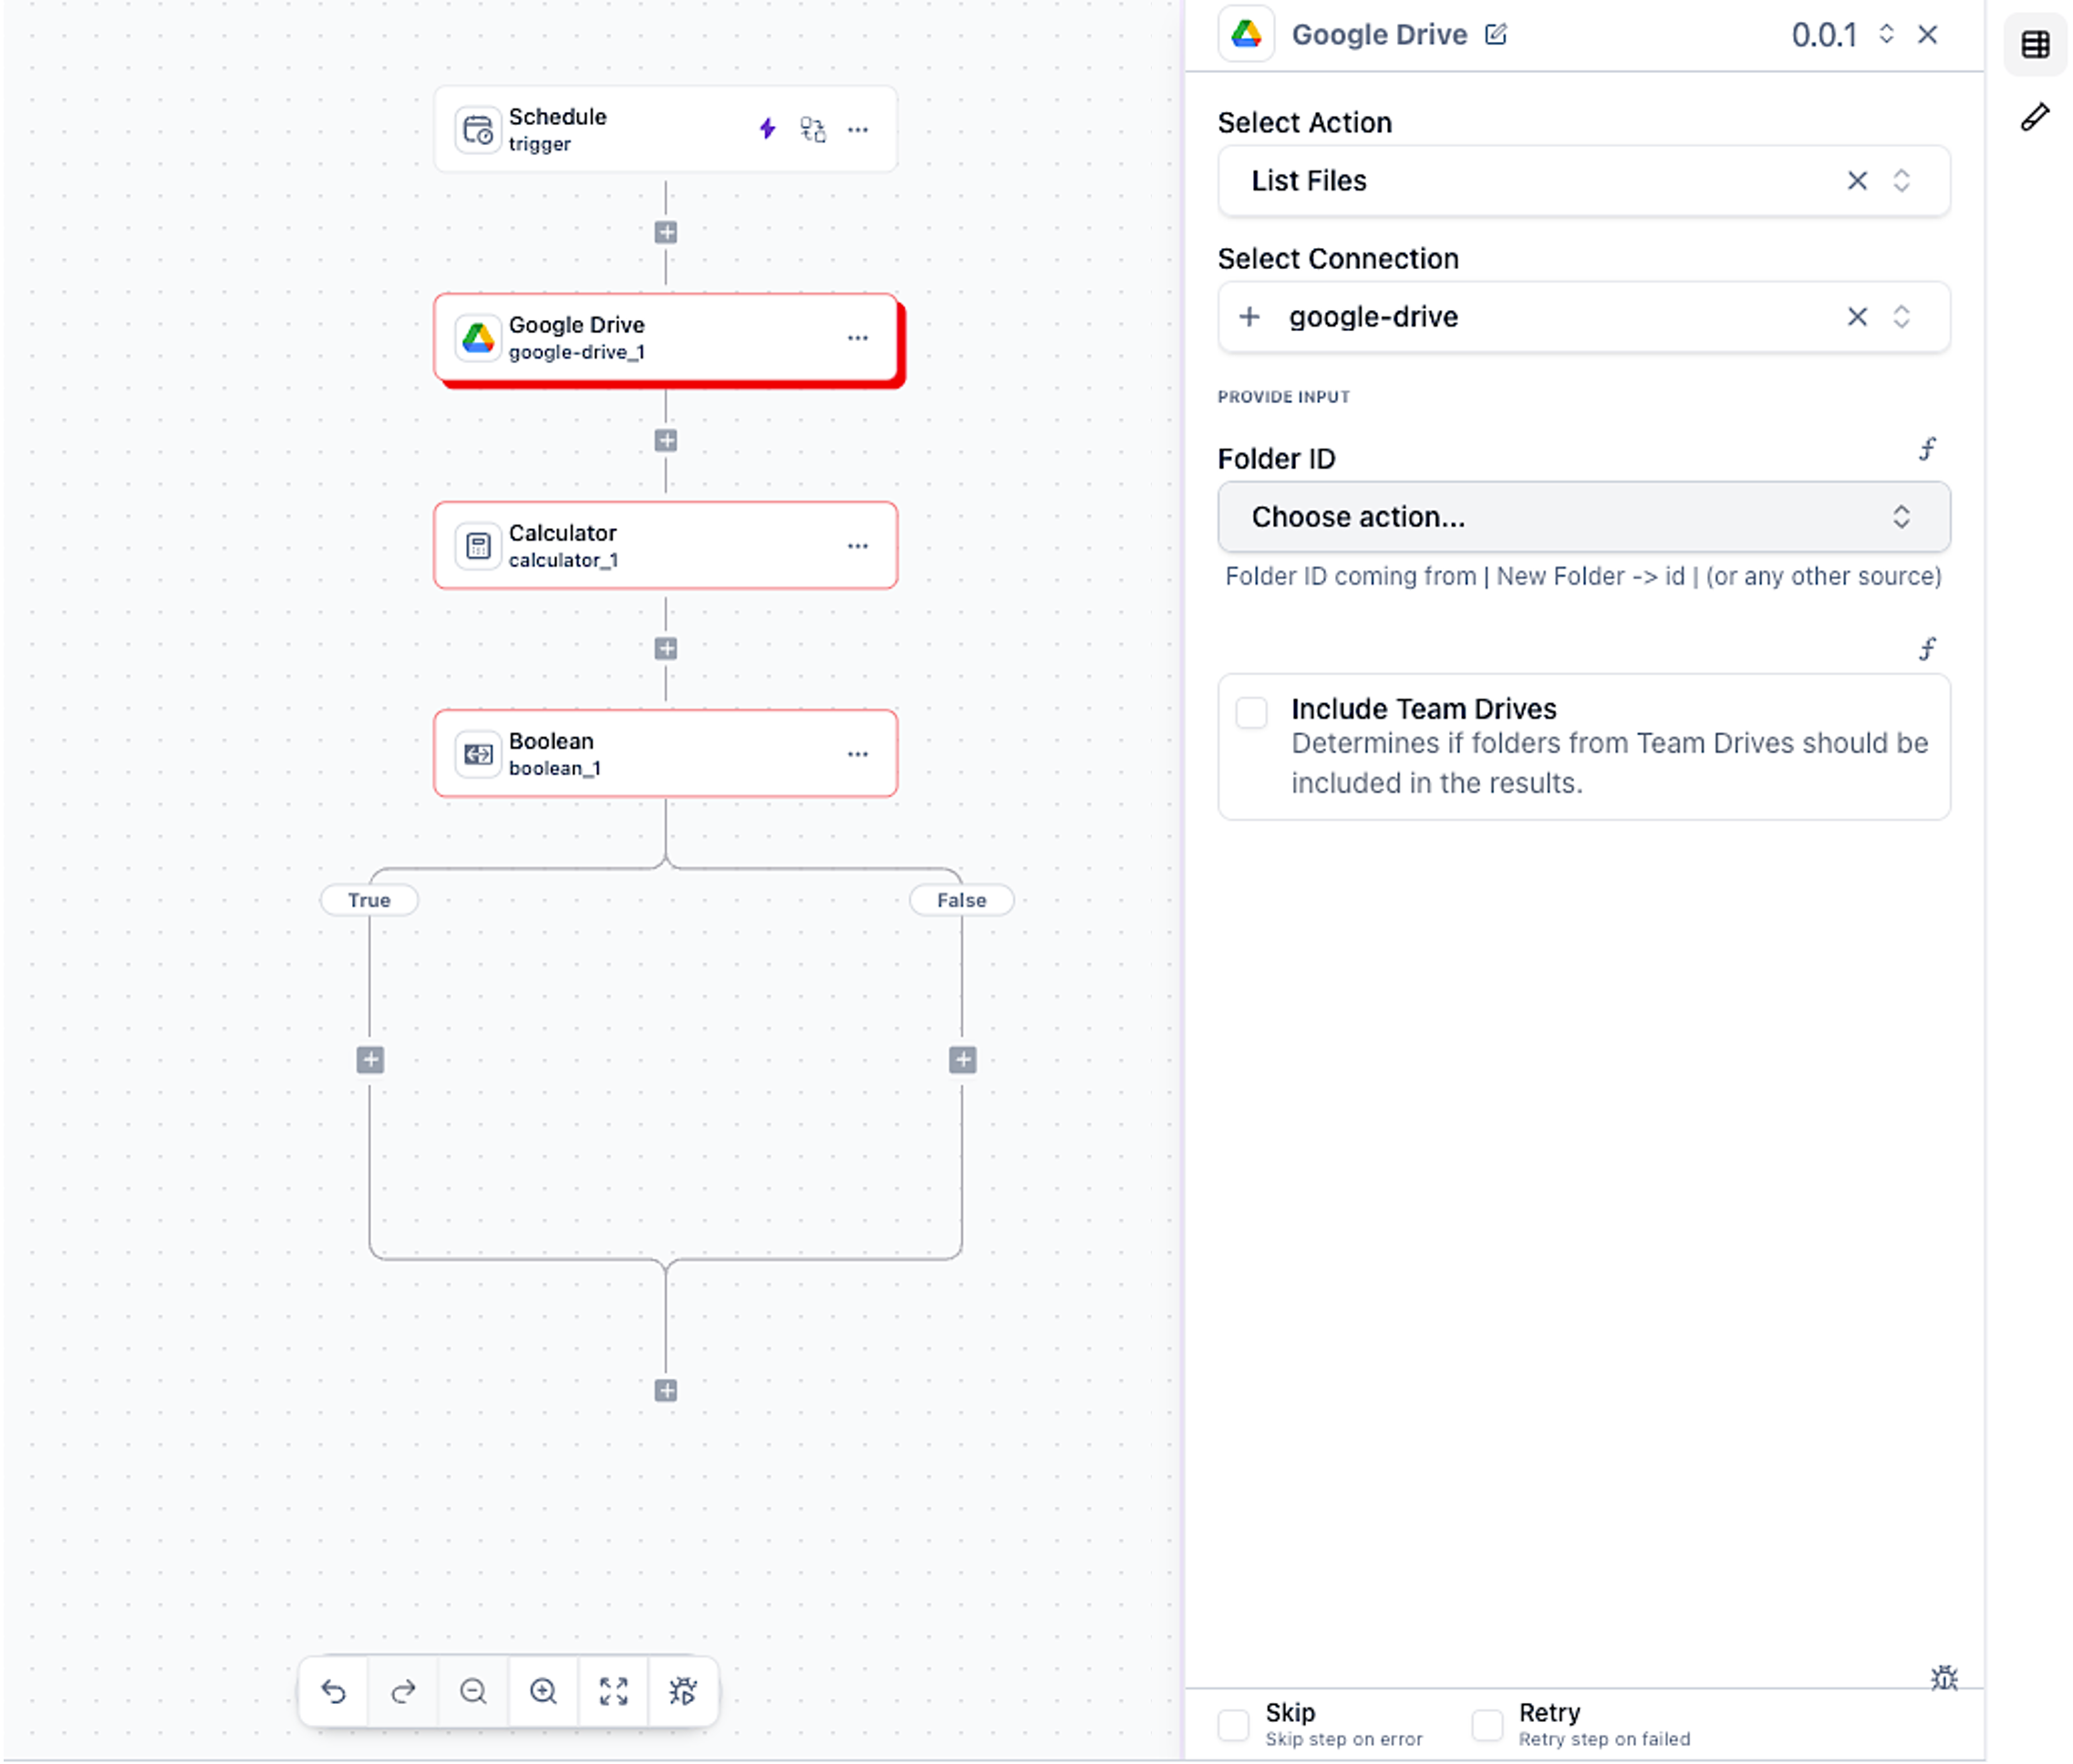
3. Main Editor
The central workspace where you build your workflow visually. Elements include:
- Trigger: The starting point of your workflow
- Action Nodes: Tasks performed by your workflow
- Logic Nodes: Control the flow of your workflow
- Integrations: Connection to external application/data used in a workflow
The editor contains all available components that you can be used in a workflow. The editor control allow to add, remove or replace components in the workflow.
4. Properties Panel
When you select a component on the editor, the Properties Panel displays configuration options for that component to the right side bar of the editor. This panel allows you to customize the selected component’s behavior and settings. Key sections include:
- Basic Settings: Name, description, and component-specific options
- Advanced Settings: Additional configuration options
- Input/Output Mapping: Configure data flow between steps
- Error Handling: Define behavior when errors occur
- Testing: Run tests on the selected component
5. Integrations Section
From the editor when you click on the ”+” button below the trigger, you can add an integration to your workflow.
The Integrations section allows you to connect your workflow with internal or external platforms and services. Here you can:
- Browse available integrations by category
- Connect new integrations to your account
- Manage existing integration connections
- Configure integration-specific settings
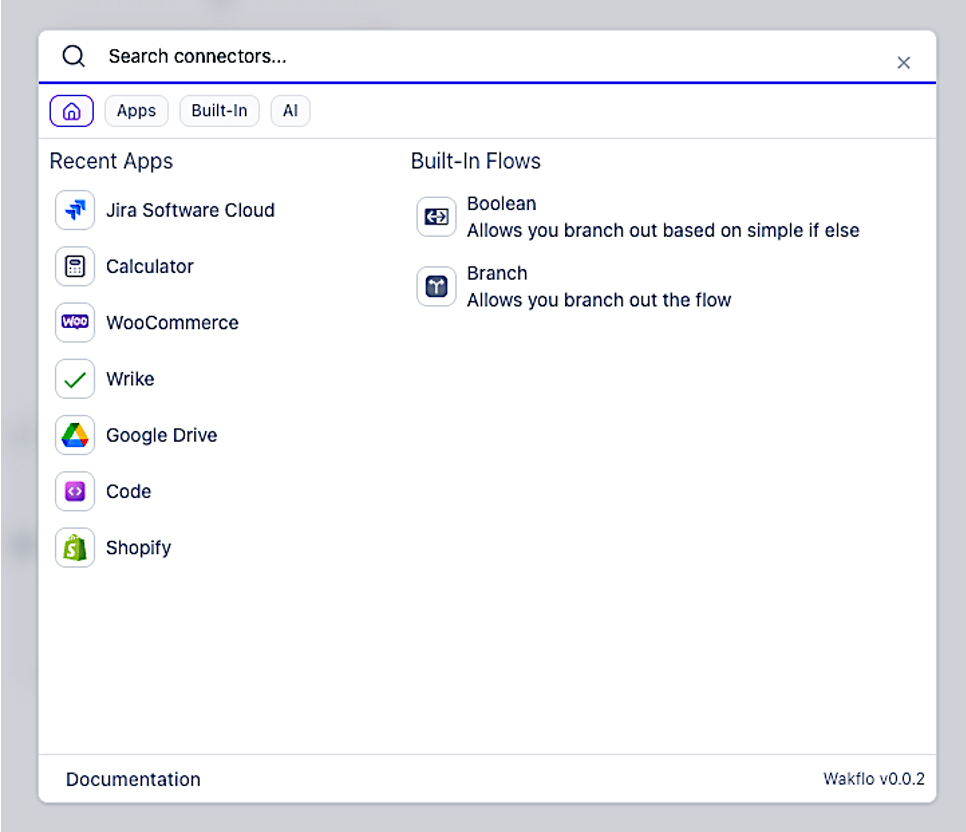
Integration Categories
Integrations are organized into categories for easy navigation:
6. Monitoring Panel
The Monitoring section provides tools to track, analyze, and optimize your workflows:
- Dashboard: Overview of workflow performance
- Runs: Summary of executions of workflow runs
- Logs: Detailed logs for exectuion in each step for tracing and debugging issues
- Analytics: Performance metrics and trends
Building Blocks
Every Wakflo workflow consists of these essential building blocks:
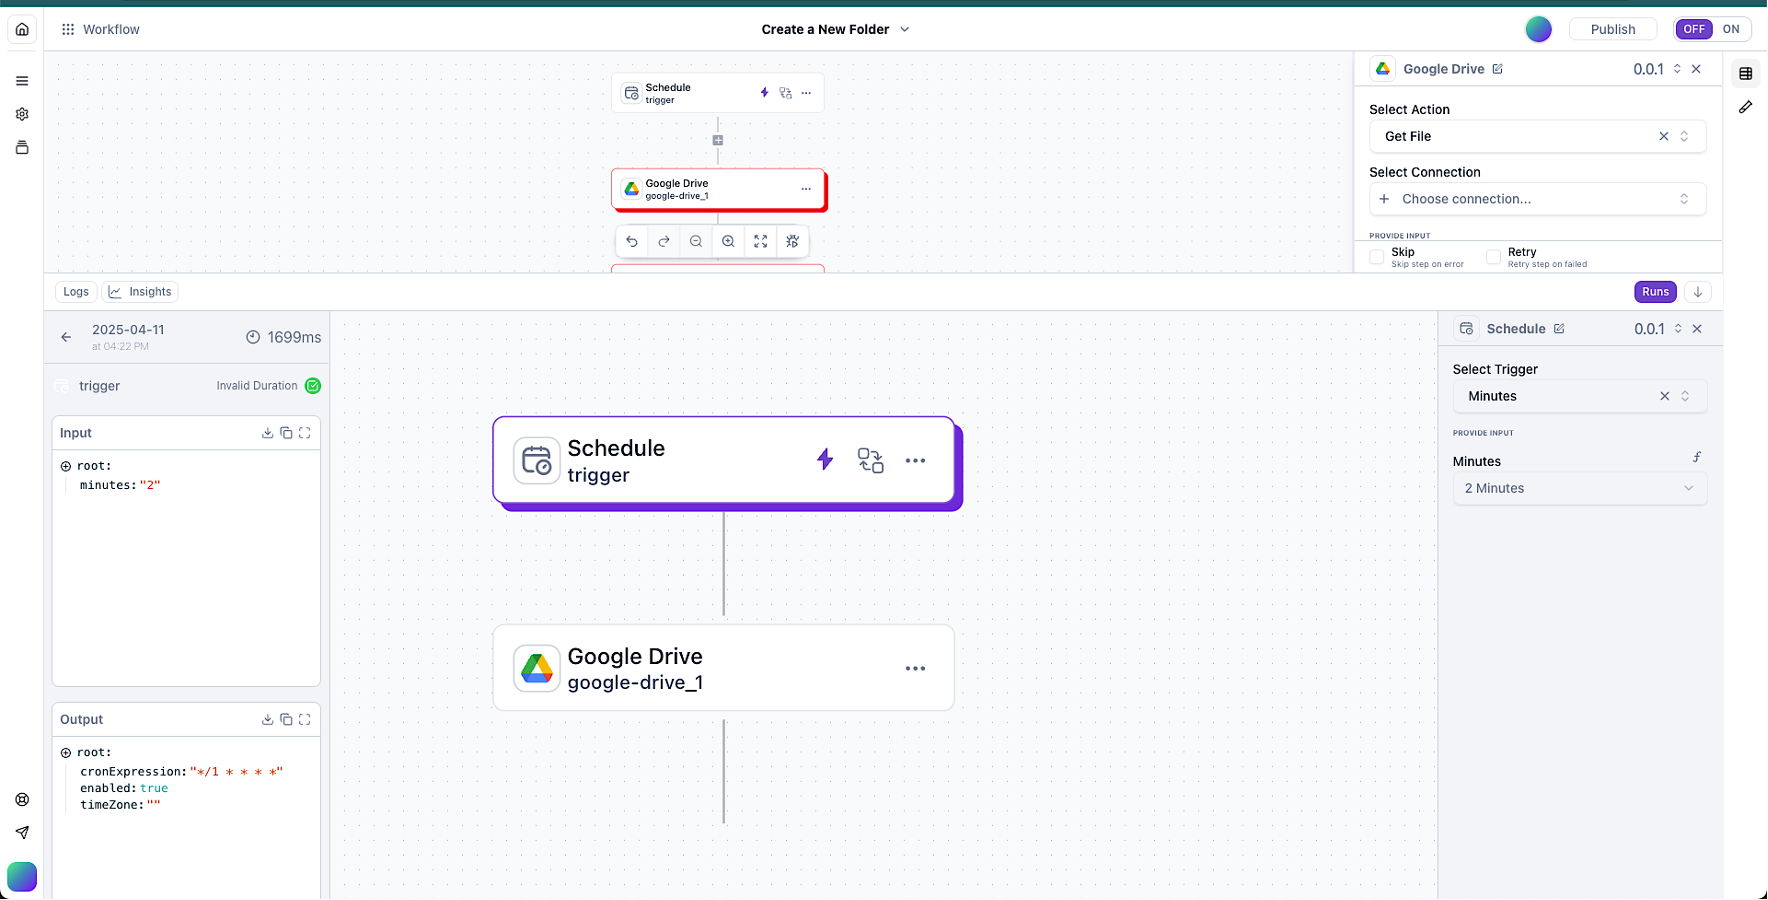
Triggers
Triggers are events that start your workflow. A workflow must have exactly one trigger, which defines when the workflow should run.
App Triggers
Events from your connected ecommerce platforms (new orders, product updates, inventory changes)
Schedule Triggers
Time-based triggers that run workflows at specified intervals or times
Webhook Triggers
Custom endpoints that can receive data from external systems
Manual Triggers
Start workflows on demand through dashboard or API
Learn more about available triggers in the Triggers documentation.
Actions
Actions are the tasks performed by your workflow. A workflow can have multiple actions that execute in sequence.
App Actions
Operations performed on your connected ecommerce platforms
Code Execution Actions
Send emails, SMS, or notifications
Data Manipulation
Transform, filter, or aggregate data
External Services
Interact with third-party APIs and services
Explore the full range of actions in the Actions documentation.
Logic Components
Logic components control the flow of your workflow based on conditions and data.
Conditions
Create branches in your workflow based on specific criteria
Loops
Iterate through lists of data
Delay
Pause workflow execution for a specified duration
Error Handling
Define fallback actions when errors occur
Building a Workflow
Follow these steps to build a workflow:
1. Add a Trigger
- After creating a new workflow, you will be prompted to add a trigger
- From the Integrations View, select the Triggers tab
- Drag the desired trigger onto the canvas
- Configure the trigger settings in the Properties Panel
- Test your trigger configuration by clicking the test button on the Properties Panel
2. Add Actions
- Click the + button below your trigger
- Select an integration and associated action from the Integrations View
- Configure the action settings
- Continue adding actions as needed
3. Add Logic (Optional)
- Add conditions, loops, or other logic components where needed
- Configure the logic settings
- Connect actions to different branches or paths
4. Configure Data Mapping (Optional)
Data mapping allows you to use manipulate data from previous steps:
- Select the appropriate data mapping integration (e.g., JSON, CSV)
- Configure the desired action in the Properties Panel
- Test the data mapping by clicking the test button on the Properties Panel
- Ensure that the data flows correctly between steps
5. Code Execution (Optional)
- Add Code integration and select the language. (NodeJS & GoLang supported)
- Write your custom code in the editor
- Test the code execution by clicking the test button on the Properties Panel
Code execution is an advanced feature. Ensure you have the necessary permissions and knowledge to use it effectively.
Ensure to use the return syntax and output a valid json so subsequent steps can use the output of the code.
Workflow Controls
The toolbar provides several important controls for your workflow:
- Save: Saves the current state of your workflow
- Test: Runs the workflow with test data
- OFF/ON: Toggles the workflow’s active status
- Runs: View past executions of this workflow
- Settings: Configure workflow-level settings
- Version History: View previous versions of the workflow
Advanced Features
Using Environment Variables
Environment variables allow you to store sensitive information or reusable values:
- Go to Settings > Environment Variables
- Create variables for API keys, URLs, or other config values
- Reference these in your workflow using
{{env.VARIABLE_NAME}}
Debugging Tools
Troubleshoot your workflows with these tools:
- Test Mode: Test individual actions or the entire workflow
- Execution Logs: View detailed logs of each workflow run
- Visual Inspector: Examine data at each step of the workflow with an interactive visual of the workflow execution
Next Steps
Now that you’re familiar with the Workflow Builder, explore these resources: